Flat Lays That Don't Look Like Everyone Else's: Product Photography for Beauty and Accessories
Light, composition, backgrounds, props and editing for beauty and accessory flat lays, using a phone and inexpensive kit, with ways to develop a recognisable style.
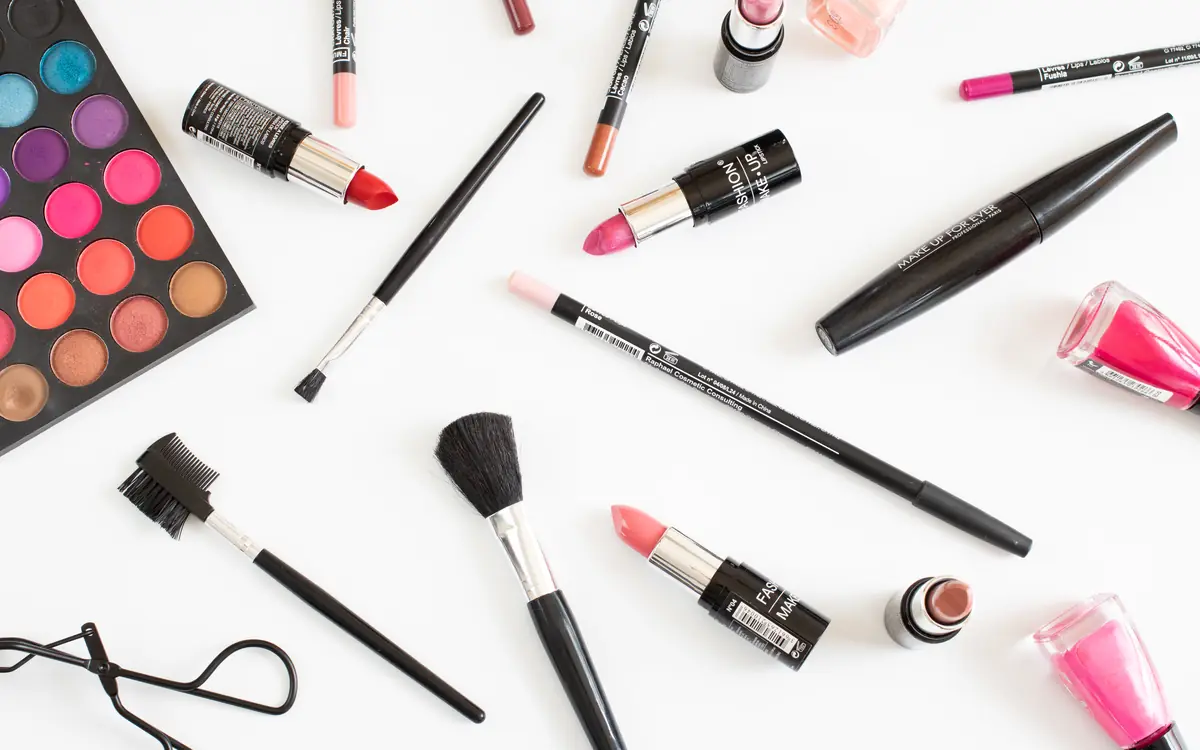
The overhead flat lay is everywhere in fashion and beauty content: a lipstick, a ring, a pair of sunglasses and a sprig of eucalyptus on a marble background. It is popular because it works, but that popularity has made most flat lays look the same.
This guide covers the fundamentals, then how to develop a look people recognise as yours.
The kit you actually need
- A phone with a decent camera. Most recent phones are more than capable.
- A large window, ideally with indirect daylight.
- Two pieces of white foam board, one to bounce light and one to use as a background or reflector.
- A piece of black card to add contrast or shadows.
- A simple overhead mount or a stable chair to shoot from above. An inexpensive phone tripod with an arm works well.
- Backgrounds: anything flat and interesting; more on this below.
Light first
Light makes or breaks a flat lay.
Use soft, directional window light
Place your set-up next to a large window, with the light coming from the side. Avoid direct sunlight unless you want hard, graphic shadows; diffuse it with a sheer curtain or baking paper taped to the window.
Control shadows
Put a white board opposite the window to bounce light into the shadows and soften them. Use black card on that side instead to deepen shadows for a moodier look.
Avoid overhead room lights
Mixing daylight with warm indoor bulbs creates uneven colour casts that are hard to fix. Turn indoor lights off.
Shoot at consistent times
If you want a consistent look across a series, shoot at roughly the same time of day.
Composition
Start with a hero
Decide which item is the star. Place it first, slightly off-centre, and build around it.
Use a structure
Common structures:
- Grid: items aligned in neat rows. Clean and graphic.
- Diagonal: items arranged along a diagonal line, creating movement.
- Triangle: three main items forming a triangle, with smaller items filling gaps.
- Negative space: one item with lots of empty space, ideal for text overlays and minimal brands.
- Organic cluster: a loose, natural-looking arrangement that feels "just put down".
Mind the edges
Let some items crop off the edge of the frame. It makes the image feel like part of a bigger scene.
Edit ruthlessly
Remove anything that does not support the hero. Most flat lays improve when you take one or two props away.
Backgrounds and props
The fastest way to escape the generic look is to choose distinctive backgrounds and props.
Background ideas
- Textured paper or card in a strong colour.
- Linen, denim or other fabric with visible texture.
- Painted plywood boards, which are cheap and reusable.
- Ceramic tiles from a hardware store.
- Concrete paving slabs.
- Old books, maps or sheet music.
- Vinyl photography backdrops that imitate materials.
Props with purpose
Props should tell a story about the product or the person who uses it:
- For a travel-size skincare set: a passport, a boarding pass, a folded scarf.
- For a sunscreen: sand, a straw hat, a paperback.
- For a vintage ring: a handwritten letter, an old photograph, dried flowers.
Avoid props that have become clichés in your niche, unless you use them in an unexpected way.
Beauty-specific tips
Swatches
Swatch products on a neutral surface or on skin, in the same light as the product shots. Use a consistent swatch layout so viewers can compare across posts. See our guide to inclusive swatching.
Textures
Show texture with smears, droplets or squeezes of product on glass or acrylic. A small spatula or the back of a spoon helps shape them.
Colour accuracy
Beauty viewers care about accurate colour. Use a white or grey card in a test shot to set white balance, and avoid heavy filters that shift shades.
Accessories and jewellery
- Reflections are the main challenge. Shoot with soft light, use a large white card above or beside the item, and angle shiny surfaces slightly to avoid reflecting the phone.
- Scale: include something that indicates size, such as a hand, a coin or a familiar object.
- Detail shots: take close-ups of clasps, engravings and textures as well as the overall layout.
Shooting
- Shoot straight down. Use your phone's grid and level indicator to make sure the camera is parallel to the surface; tilted shots distort shapes.
- Lock focus and exposure on the hero item.
- Shoot more than you need, adjusting one element at a time.
- Take a few angled shots too; a slight angle can add depth.
Editing
- Straighten and crop first.
- Adjust white balance for accurate colour.
- Lift shadows gently and set the exposure so whites are clean but not blown out.
- Remove dust and blemishes with a healing tool.
- Apply a consistent preset if you have one, but adjust per image.
For beauty products, do not edit the product's effect, colour or texture in a way that misrepresents it, especially in sponsored content.
Developing a signature style
A recognisable style comes from consistency in a few choices:
- A limited palette of background colours.
- A consistent light direction and mood: bright and airy, or dark and dramatic.
- A recurring composition style: say, always diagonal or always negative space.
- A signature prop or texture that appears often.
- A consistent edit.
Look at your last twenty images and ask which ones feel most like you. Write down what they share and do more of it.
A five-step routine
- Choose a hero and a story.
- Set up by a window with side light and a bounce board.
- Build the composition, then remove one prop.
- Shoot straight down, plus a few angles and close-ups.
- Edit for accuracy, then for mood.
With practice, a flat lay takes twenty minutes. Developing a style that makes people stop scrolling takes longer, but it is what turns product photos into a body of work.
Frequently asked questions
How do I keep the phone level overhead? Use a spirit level app or the camera's grid and level guide, and an overhead arm.